Outside Plastering: Safeguard and Improve Your Property with Expertise
Outside Plastering: Safeguard and Improve Your Property with Expertise
Blog Article
Comprehending the Necessary Techniques of Plastering for Home Improvement Projects
In the world of home renovation, grasping the essential techniques of gluing can considerably enhance both the capability and aesthetic appeal of an area. Different methods exist, each tailored to details applications, whether for bring back historical integrity or updating interiors. The plastering procedure includes critical points, from precise surface preparation to the specific application of products. Understanding these foundational aspects is key, yet many property owners neglect usual risks that can weaken their initiatives. As we explore these methods further, the subtleties of accomplishing a remarkable surface will end up being significantly obvious.
Kinds of Smudging Methods
Although different gluing methods exist, each serves an unique function and uses distinctive aesthetic top qualities. One of the most common techniques is standard lime plastering, which is understood for its breathability and flexibility. This strategy is specifically advantageous for older structures, enabling wetness to escape while maintaining architectural integrity.
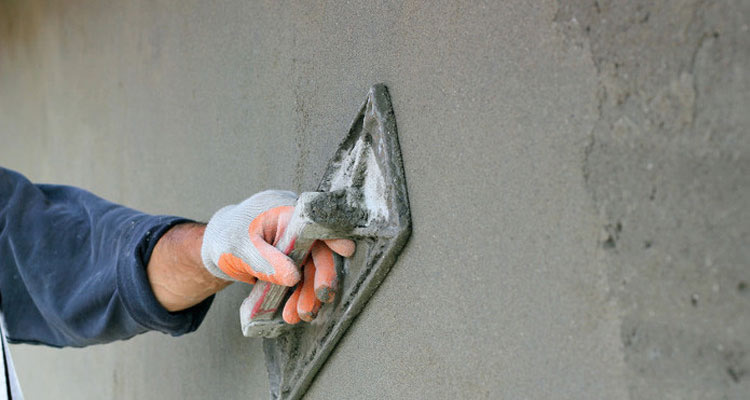
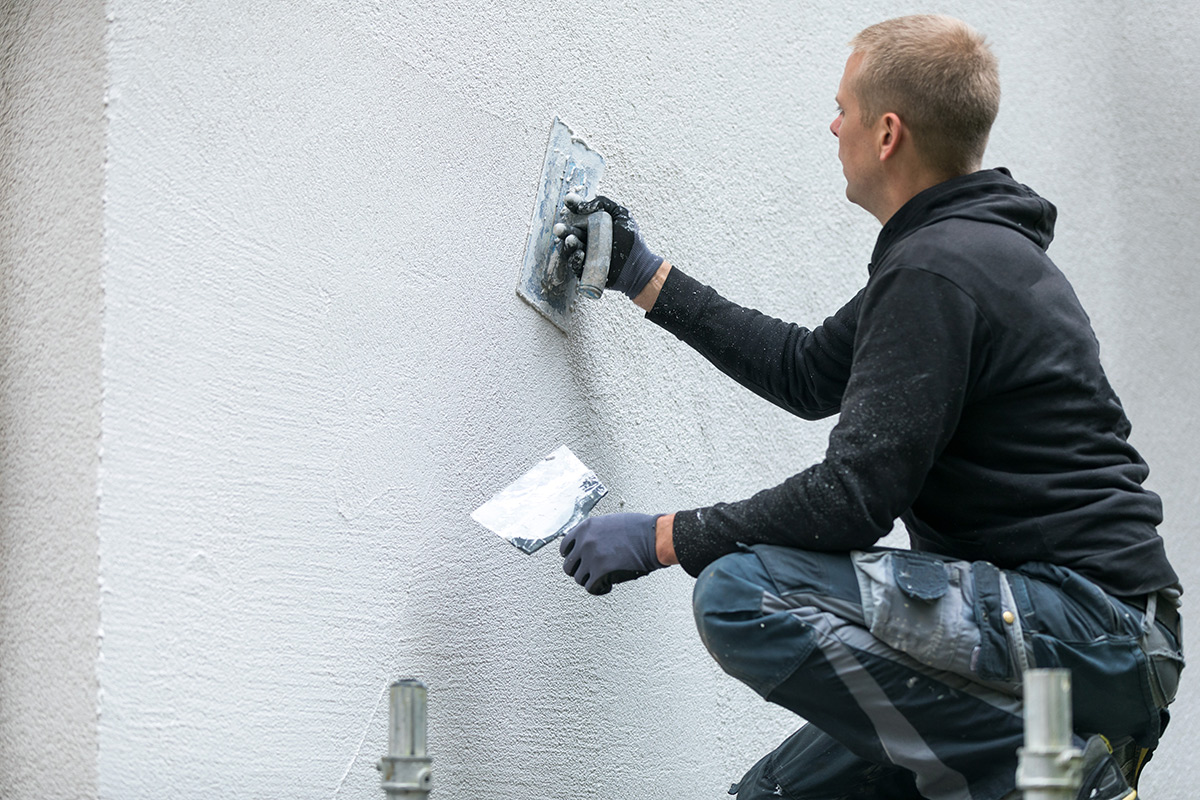
Another extensively utilized strategy is gypsum plastering, which includes the application of a quick-setting compound. It offers a smooth surface and is perfect for interior walls and ceilings, making it a popular option in contemporary building. For a much more textured appearance, trowel-on plastering methods such as stucco and Venetian plaster are typically used. Stucco, frequently utilized in exteriors, supplies resilience and weather condition resistance, while Venetian plaster is renowned for its glamorous, refined coating.
Additionally, there are much more specialized techniques, such as skimming, which is a process that involves applying a thin layer of plaster over existing surface areas to produce a smooth finish. Each of these strategies can substantially affect the total aesthetic and functionality of a room, making it necessary to pick the proper approach based upon the details needs of a job.
Tools and Materials Needed
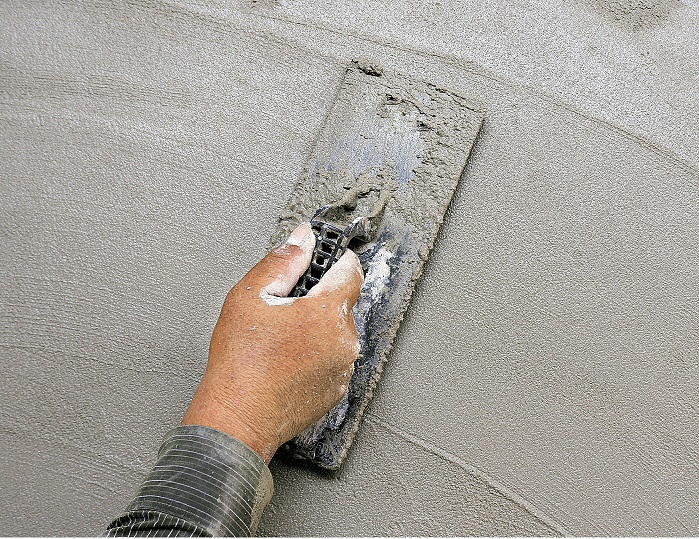
Crucial tools and products are critical for effective plastering, ensuring both efficiency and high quality in the application process. A detailed plastering toolkit generally includes a hawk, trowels, and a float. The hawk offers as a platform to hold the plaster, while the trowels, offered in different dimensions, are essential for application and smoothing. A float, commonly made from rubber or sponge, is used to accomplish an uniform coating.
Spending in high-grade tools and materials eventually adds to a much more successful plastering job, producing a durable and cosmetically pleasing surface. Effectively equipped, you lay the foundation for efficient gluing and home improvement.
Step-by-Step Plastering Refine
With the right devices and products in hand, the next stage involves carrying out the smudging procedure with precision. Begin by preparing the surface area to ensure ideal adhesion. Remove any loosened debris, dust, or old plaster, and apply a bonding agent if required.
When the surface area is prepped, blend the plaster according to the manufacturer's directions, achieving a smooth, lump-free consistency. Making use of a trowel, use the first layer, called the scratch coat, to a density of regarding 5-10 mm. Guarantee uniform insurance coverage, and utilize a comb or scratcher to produce grooves for far better adhesion of subsequent layers.
After allowing the scratch coat to set partially, apply the second layer, or the brownish layer, smoothing it out for an also surface. Permit this layer to completely dry, typically for 24-48 hours, relying on the problems. Finally, use the ending up layer, which ought to be thinner and smoother. Feather the sides to blend into the surrounding surface, accomplishing a seamless look.
When the plaster has actually dried out thoroughly, it can be fined sand lightly to get rid of imperfections. Follow up with a guide before painting for a sleek last appearance.
Usual Blunders to Avoid
Falling short to identify usual errors can significantly impact the quality of your plastering job. One frequent error is insufficient surface area preparation. Stopping working to prime and clean the surface can cause inadequate adhesion, causing cracks and peeling off. Moreover, neglecting to fix any underlying problems, such as wetness or architectural damages, can endanger the plaster's honesty.
Timing is likewise critical; several unskilled plasterers rush the application. Allowing the initial layer to completely dry entirely prior to using subsequent layers is vital to avoid excessive splitting and contraction.
Furthermore, not making use of the right devices can prevent the ending up procedure. Making use of trowels that are too big or little can impact your control and the smoothness of the surface - Plastering. Last but not least, neglecting environmental conditions, such as temperature level and moisture, can bring about uneven drying out and disappointing outcomes. By being mindful of these usual challenges, you can enhance the performance and longevity of your plastering job.
Tips for Finishing Touches
Achieving a remarkable click over here surface in plastering calls for focus to detail and a couple of strategic methods. When view it the preliminary application has actually dried, start the finishing process by utilizing a moist sponge or trowel to ravel any type of imperfections. This action not just enhances the surface yet also aids to get rid of any kind of excess plaster that might have dried unevenly.
Following, think about making use of a fine-grit sanding block or post sander for a more refined appearance. Fining sand ought to be done carefully to avoid damaging the underlying layer - Plastering. Constantly put on a mask to safeguard versus dirt breathing
After sanding, inspect the surface under various lighting conditions to determine any type of missed areas or inconsistencies. Apply a thin layer of finishing plaster if needed, feathering out the sides to mix seamlessly with the bordering area.
Verdict
In conclusion, grasping vital plastering methods dramatically boosts the top quality of home improvement projects. Recognizing the different kinds of gluing approaches, using appropriate devices and products, and adhering to a systematic application process add to achieving a smooth and sturdy surface.
In the realm of home improvement, understanding the important strategies of plastering can significantly improve both the performance and aesthetic charm of a space.Although different gluing strategies exist, each serves a special purpose and offers distinctive visual top qualities. Plastering. For a much more distinctive look, trowel-on plastering strategies such as stucco and Venetian plaster are usually used. Stucco, frequently utilized in outsides, supplies resilience Read Full Article and weather condition resistance, while Venetian plaster is renowned for its lavish, sleek finish
Commonly made use of plaster kinds consist of gypsum plaster, lime plaster, and cement-based plaster, each serving various objectives and settings.
Report this page